Monday, July 26, 2010

Oreo Cream Cheese Truffles

Last week was my Birthday week and I decided to make one of my favorite desserts... Oreo Cream Cheese Truffles. They are very rich and to die for! The recipe is as follows...


Tools Needed:
The usual (measuring utensils, mixing bowls etc.)
Double boiler, crock pot or microwave
Foil or wax paper
Baking sheet
Chocolate dipper tools

Ingredients:
1 package of Oreos (I used regular but I imagine double stuffed or mint would be very good)
1 8 ounce package of cream cheese
2 8 ounce packages semi-sweet baking chocolate

Melt packages of semi-sweet baking chocolate. I used a crock pot to melt the chocolate but that is only because I HATE double boilers and never fail to burn myself while using them. The downside to using a crock pot is that the truffles will not look as pretty. There are several ways to melt chocolate, I suggest reading this how to article and decide which method will work best for you.

Crush 36 Oreos into fine crumbs using a food processor (Oreos can also be finely crushed in a resealable plastic bag using a rolling pin). If you would like to top your truffles off with Oreo crumbs then crush 9 of them to fine crumbs in food processor; reserve for later use. Place crushed Oreos in a medium bowl. Add softened cream cheese and mix until well blended. 

Roll cookie mixture into 25 to 50 balls (depending on how big you want your truffles). Place balls on a baking sheet lined with foil or wax paper and put in the freezer for 10 to 20 min.

Using chocolate dipper tools dip balls in melted chocolate and place back on the wax or foiled baking sheet. If you do not have chocolate dipper tools a fork or small slotted spoon will also work. Sprinkle your truffles with reserved cookie crumbs.

Place your truffles in the freezer until firm, about 30 min. Store leftover truffles, covered, in refrigerator or freezer. Enjoy!


As always this baking blog was edited for deliciousness by The Lady in Red.

Sunday, July 18, 2010

Laura's Peach Pie

Chris (my man) and I joined Native Roots Market's Garden Club for the summer. Each Friday we receive a fresh basket of local fruits, vegetables, herbs, spices and recipes. Everything is wonderful!

Last week we received several beautiful peaches and Laura's Peach Pie recipe. The Peach Pie was absolutely fantastic! The recipe is as follows...

Filling Ingredients:
1 Graham cracker crust
1 lb Fresh peaches
5 Tablespoons of granulated sugar
1/2 Teaspoon ground cinnamon
Dash cayenne (don't skip this ingredient!!)
2 Tablespoons all purpose flour
1/4 Tablespoons fresh squeezed lemon juice
1/8 Teaspoon kosher salt

Filling Directions:

Peel, slice and core peaches.

Place sugar, cinnamon, cayenne, flour and salt in a bowl. Place peaches in the bowl. Mix with spatula until fruit is coated. Next add lemon juice and mix. Add filling mixture to graham cracker crust.

Topping Ingredients:
1/2 Cup chopped pecans
1/4 Cup granulated sugar
1/4 Cup brown sugar
1/2 Teaspoon cinnamon
6 Tablespoons all purpose flour
4 Tablespoons unsalted butter
1/4 Cup oats
1/8 Teaspoon kosher salt

Topping Directions:
Cut (** Don't know how to "Cut butter"? No worries... I didn't either! Check out this how to article) butter into flour, brown sugar and granulated sugar until butter is almond size. Add salt, oats, cinnamon and pecans. Mix until incorporated. 

Add on top of fruit. Make sure all fruit is completely covered and freeze pie overnight (you do not have to freeze pie overnight but, be sure to put it in the freezer for at least an hour).

Baking Instructions:
  1. Preheat oven to 375 degrees
  2. Place on baking sheet
  3. Bake for 45 min
  4. Let cool for 30 min and enjoy!!!
This pie was so good. I'm sorry I don't have a picture of a slice... it was all gone before I had the chance!!!

As always this baking blog was edited for deliciousness by The Lady in Red.

Friday, July 9, 2010

Yay New Blog!

I have FINALLY taken the time to start this blog! I'm attempting to expand my knowledge in the area's of baking, baking photography and anything else I might currently be enjoying. I ♥ to bake and am really excited to share the recipes I find with all of you! The majority of what I make will be cookies, candy and pie. I will not make much cake because I'm not really a cake eater. Not to say that I don't like cake... I would just rather eat something else like... cheese cake or ice cream or truffles!

So the blog design that I currently have is still in the works! I should have something much more appropriate for a baking blog soon. My designer is my friend Nick and you can see his amazing artistic abilities at www.nickrboltondesign.com.

Today's blog will be a dedication to two of the favorite things I have made in the past. Enjoy!


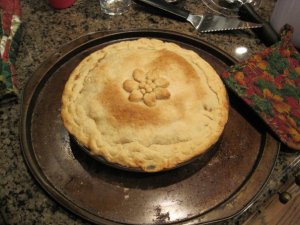
I have always been afraid to make Apple Pie... it just seemed so difficult until I found this website!

Everyone loves cupcakes! Don't waste your time mixing cupcake ingredients... they are just as good if not better from a box (I suggest Betty Crocker Super Moist but don't take my word for it! Read this article!). With cupcakes you should spend your time on frosting and decorations! I used these cake decorating tools from Pampered Chef to add the uhhh mazing icing!

As always (well... from this point forward anyway) this baking blog was edited for awesomeness by The Lady in Red.